In part 1 we covered the fundamentals of implementing a React front-end into your Umbraco site, using the Content Delivery API for that headless experience.

In parts 2 & 3 we’re going to cover some more advanced topics: React Router, and implementing the Block Grid editor on the front-end as React components. In this article we’ll cover setting up React Router.
It is assumed that you have basic knowledge of React, experience building Umbraco websites from scratch, and you are familiar with document types, compositions, and data types.
Preparing the environment
Setting Up Umbraco
In part 1 we used the command line to get an Umbraco site set up with the Clean Starter Kit, however in this article we want to simulate a real-world website build, and so we’re going to start with an empty CMS and create all the document types and data types that we’ll need by hand.
In a new folder run these commands in a command prompt to get started…
Ensure we have the latest Umbraco templates
dotnet new install Umbraco.Templates --force
Create solution/project
dotnet new sln --name "UmbReactPart2"
dotnet new umbraco --force -n "UmbReactpart2.Example" --friendly-name "Administrator" --email "admin@example.com" --password "1234567890" --development-database-type SQLite
dotnet sln add "UmbReactpart2.Example"
Open appSettings.json and enable the Content Delivery API:
{
...
"Umbraco": {
"CMS": { ...
      "DeliveryApi": {
        "Enabled": true
}
...
}
}
}
In Program.cs add .AddDeliveryApi() to CreateUmbracoBuilder():
builder.CreateUmbracoBuilder()
.AddBackOffice()
.AddWebsite()
.AddDeliveryApi()
.AddComposers()
.Build();
Run your project and log in to Umbraco using these credentials:
Username: admin@example.comPassword: 1234567890
Setting up the document types
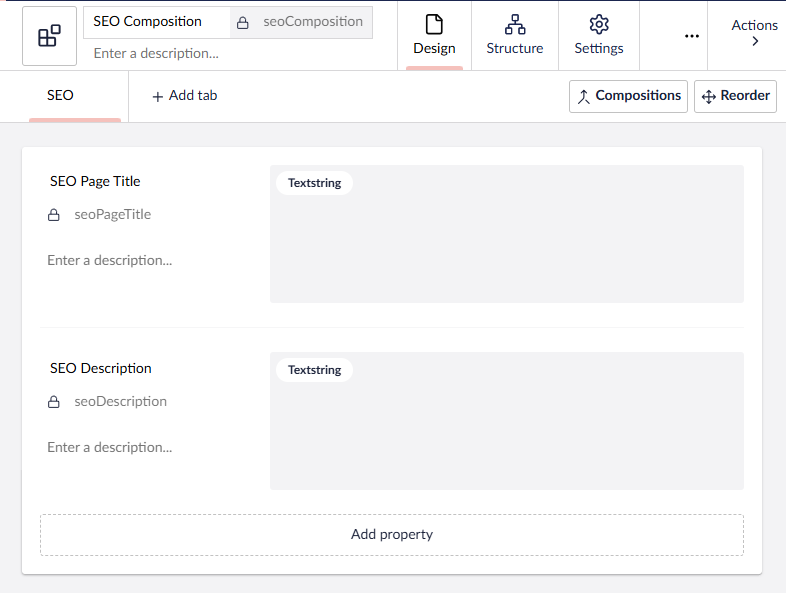
Go to the Settings section and create a new Document Type folder and call it “Compositions”. In this folder create a new Element Type called “SEO Composition” with the following properties:
-
New tab called “SEO”
-
New property called “SEO Page Title” - Textstring
-
New property called “SEO Description” - Textstring
-
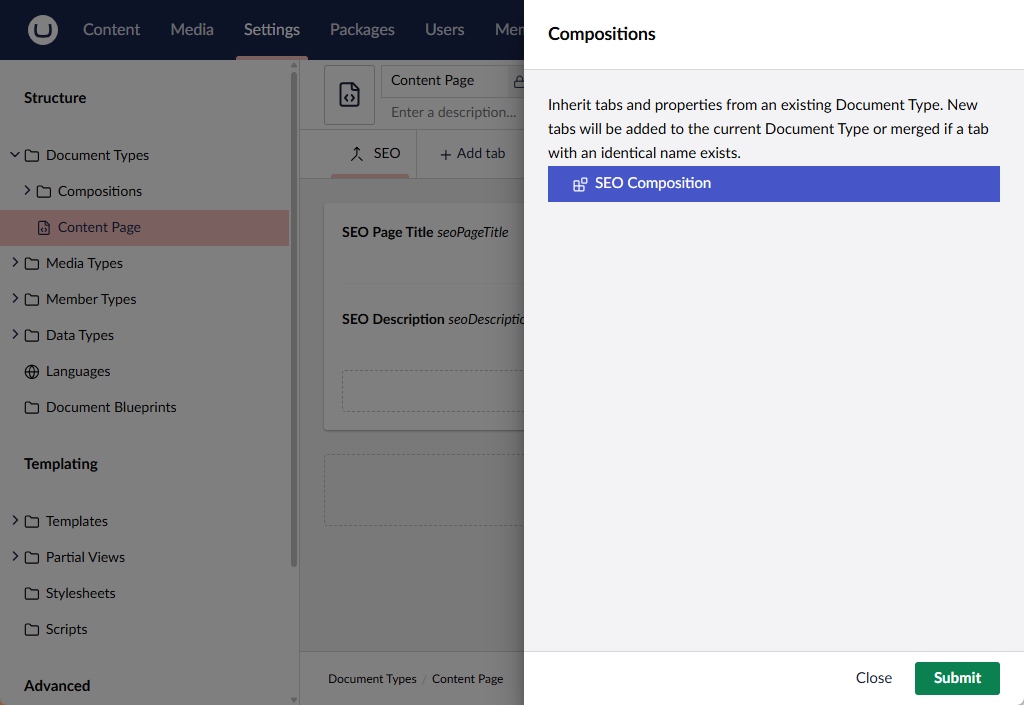
In the root Document Types folder, create a new Document Type with Template called “Content Page” and add our composition.
Save the Content Page document type, and then in the Structure tab check the “Allow at root” option, and under “Allowed child nodes” select “Content Page” (you may need to refresh the page if you can’t see this option).
Setting up the templates
The last thing we’ll do in the Settings section is to add a layout view for the template that was created when we created our “Content Page” document type. Under Templates create a new template and call it “_Layout”.
We’re going to add some boilerplate HTML into this view:
@inherits Umbraco.Cms.Web.Common.Views.UmbracoViewPage
<!doctype html>
<html lang="en">
<head>
<meta charSet="utf-8" />
<meta name="viewport" content="width=device-width, initial-scale=1.0" />
<title>@Model.Value("seoPageTitle")</title>
<meta name="description" content="@Model.Value("seoDescription")" />
</head>
<body>
<div id="root">
@RenderBody()
</div>
</body>
One thing to note here is the <div> with an ID of “root”, this is important as it’s the element we’ll attach our React app to when we’re setting that up. Anything that is rendered out in RenderBody() will be replaced.
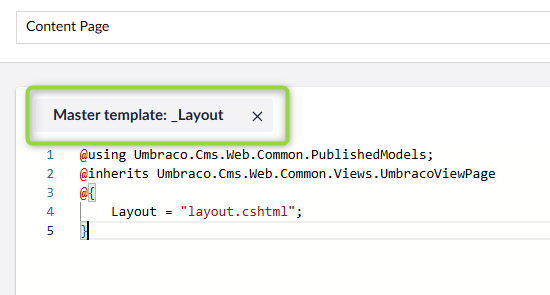
Finally in the Content Page template select Layout as the master template, and Save.
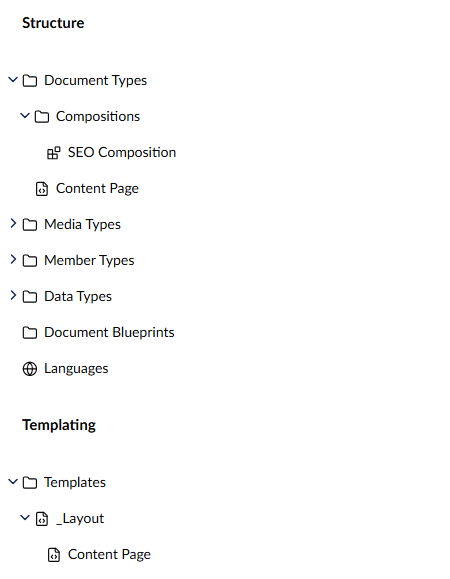
All going well we should have the following basic structure in our Settings section:
Setting up the test content
The last thing we’re going to do in Umbraco is create some dummy content. For this I’m going to create some test pages, and within each page I’ll complete the SEO fields:
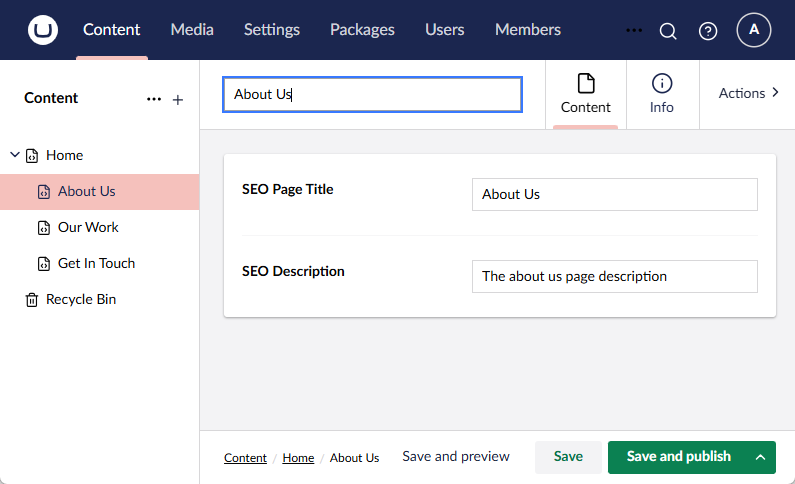
And that’s it as far as Umbraco is concerned. Let’s move on to the front-end.
Setting up React with Vite
We won’t go over this in too much detail, as it’s the exact same process that we outlined in part 1, but we’ll do a quick recap.
Run the following command in the root folder of your web project (/UmbReactPart2.Example) and select React as the framework, and either TypeScript or JavaScript as the variant. We’ll be using TypeScript in this article.
npm create vite@latest clientapp
Switch to the /clientapp directory, and run npm i.
Navigate back up to the root of your Umbraco project:
cd..
Install the Vite.AspNetCore package:
dotnet add package Vite.AspNetCore
Open Program.cs and add the following lines:
using Vite.AspNetCore;
// insert before "WebApplication app = builder.Build();"
builder.Services.AddViteServices(options =>
{
// this should match the folder name where your React files are located options.Server.PackageDirectory = "clientapp";
// Enable the automatic start of the Vite Development Server. The default value is false. options.Server.AutoRun = true;
// If true, the react-refresh script will be injected before the vite client. options.Server.UseReactRefresh = true;
});
// insert after app.UseUmbraco()
if (app.Environment.IsDevelopment())
{
// Enable all required features to use the Vite Development Server.
// Pass true if you want to use the integrated middleware.
app.UseViteDevelopmentServer(true);
}
Open _ViewImports.cshtml and add @addTagHelper *, Vite.AspNetCore
Open layout.cshtml and add this to the <head>:
<script type="module" vite-src="~/src/main.jsx" asp-append-version="true"></script>
Now if you build and run your project, you should see the Vite+React example page:

Creating our React components
We’ll create a menu component and a component for rendering our content. In a real-world application you’ll have more than this, plus you might even split some components into multiple components for maximum re-useability, but to keep this article concise we’re going to keep the front-end as simple as we can for now.
To get started let’s clear out the example code from our TSX files that is bundled with Vite. In the clientapp/src folder, remove the assets folder. Open main.tsx and App.tsx and remove any references to these files, and finally delete everything in the App() function.
In this same folder, create the following files, these are our React components:
-
menu.tsx
-
content.tsx
Create a folder called “lib” - this is where we’ll store any non-React TypeScript files.
In this folder create the following files:
-
umbracoFetch.ts
-
This will be where we store any methods for accessing the Content Delivery API
-
-
umbracoTypes.ts
-
If you’re using JavaScript instead of TypeScript you probably don’t need this, but this will be where we store our strongly-typed models for our Umbraco objects
-
Note: To keep this article short won’t show you the code for umbracoFetch.ts or umbracoTypes.ts here, but you can find the code for these files in the example code linked at the end of the article.
In menu.tsx, add links to your pages. Yours will differ, but this is what mines looks like for now:
function Menu() {
return <header>
<nav>
<ul>
<li>
<a href="/">Home</a>
</li>
<li>
<a href="/about-us">About Us</a>
</li>
<li>
<a href="/our-work">Our Work</a>
</li>
<li>
<a href="/get-in-touch">Get In Touch</a>
</li>
</ul>
</nav>
</header>
}
export default Menu;
In content.tsx we’re just going to print out the page title for now:
import { Page } from "./lib/umbracoTypes";
function Content({ content }: { content: Page | null }) {
return content && <div>{ content.title }</div>
}
export default Content;
And in App.tsx add the following code:
import { useEffect, useState } from 'react'
import './App.css'; import Menu from './menu';
import Content from './content';
import { getPage } from './lib/umbracoFetch';
import { Page } from './lib/umbracoTypes';
function App() {
const [pageData, setPageData] = useState<Page | null>(null);
const [loading, setLoading] = useState<boolean>(true);
useEffect(() => {
const fetchPage = async () => {
setLoading(true);
try {
const data: Page = await getPage(location.pathname);
setPageData(data);
} catch (error) {
console.error("Failed to fetch page:", error);
setPageData(null);
} finally {
setLoading(false);
}
};
fetchPage();
}, [location.pathname]);
return <>
<Menu></Menu>
{loading
? <div>Loading...</div>
: <>
<Content content={pageData}></Content>
</>
}
</>
}
export default App
All we’re doing here is using React’s useEffect to call our getPage method when our App component loads for the first time (if you’re not familiar with useEffect please refer to the official documentation, but basically we use useEffect when our component depends on an external system, in this case the Content Delivery API is our external system). If we successfully load content, we set loading to false and show the Content component.
Take note of line 29 here. We’re using location.pathName as a dependency. This will be important later on when we set up React Router.
The Content component takes our pageData and shows the page title. All going well we should be able to click our links and see something like this:
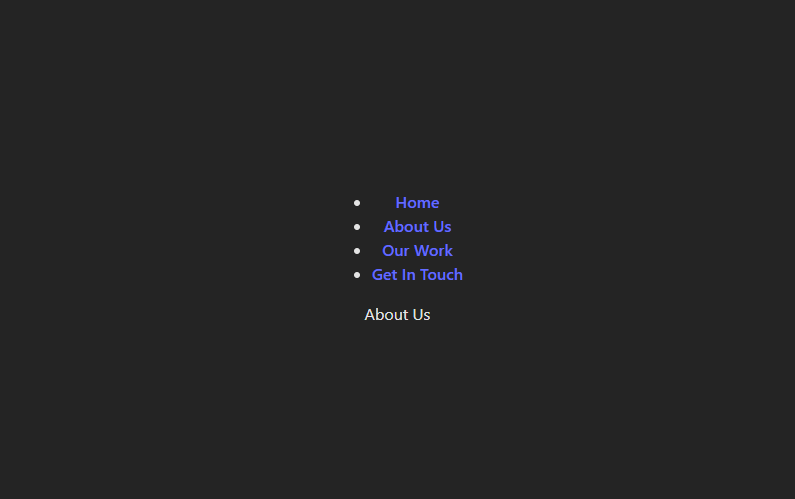
You may notice when clicking the links that our site does a full page refresh, these are after all just regular <a> tags we’re using, and the browser doesn’t care whether we’re using plain HTML or React, it handles them all the same.
For the full React experience though we want our site to load and display content dynamically, in the same page, without doing a full page refresh. For that we’ll need to use React Router.
Setting up React router for multi-page support
React Router is a standard library for routing in React applications, enabling navigation between different views or components without reloading the page. It allows us to define routes and map them to specific components, so when a user navigates to a different URL, React Router intercepts the request and updates the UI dynamically instead of triggering a full page reload.
In the root of our clientapp folder run the following command in a command prompt:
npm i react-router
We’ll be using React Router in it’s simplest configuration, a mode called Declarative. We recommend you read the documentation on the different modes so you can decide based on your project’s requirements which mode you need (for example if you were loading your site’s URLs from an API endpoint you might use the Data mode).
Open main.tsx and make the following changes:
Add an import line for our React Router components:
import { BrowserRouter, Route, Routes } from 'react-router'
And replace <App /> with the following:
<BrowserRouter>
<Routes>
<Route path="*" element={ <App /> }></Route>
</Routes>
</BrowserRouter>
Here we’re creating a new <BrowserRouter> component (which uses the Browser History API, there are other types of routers such as the HashRouter which use the /#/your-path method instead).
We are then giving our BrowserRouter a list of Routes to handle. As we want React Router to handle all of our routes we only need 1 wildcard route that uses * to capture all requests.
If you run this now you won’t see any difference in your app. The site still does a full page refresh when you click the links. This is because we’re still using plain old <a> elements. React Router comes with it’s own component for links, and that’s the <Link> component.
Open menu.tsx and add this import for the Link component:
import { Link } from "react-router";
And change our links to use this component
<ul>
...
<li>
<Link to="/about-us">About Us</Link>
</li>
...
</ul>
Now if you click the menu links in your browser, you’ll see that the path in the address bar updates and your browser no longer refreshes. React Router is now handling the links on your site. But you’ll also notice that the content doesn’t change, in fact it doesn’t seem to do anything any more. That is because of our useEffect dependency that we made a note of earlier - location.pathname.
While it’s true that technically we are changing the pathname value, this only takes effect when the browser first loads the page. Instead React Router comes with it’s own implementation of location that we can use, in the form of a hook called useLocation().
Open App.tsx and add the following import:
import { useLocation } from 'react-router';
Now add the following line in the App() function before useEffect():
const location = useLocation();
And that’s it. Now if you click links in the menu React Router handles these clicks, updates the path in the address bar, loads the content from the Content Delivery API and dynamically updates the UI to shows the new content.
But there’s one little problem now that we’re updating the content dynamically that the eagle-eyed among you might have noticed - our page title doesn’t change, it remains “Welcome to the homepage!”.
This is because in the wildcard Route we set up in main.tsx we’re telling React Router to update the <App /> element and not the <head> element. Luckily there is a simple fix for this. As of React 19 all you have to do is render out your meta tags anywhere and they’ll update them. So let’s update our App.tsx to include these:
return <>
<Menu></Menu>
{loading
? <div>Loading...</div>
: <>
<title>{pageData?.seo?.title}</title>
<meta name="description" content={pageData?.seo?.description} />
<Content content={pageData}></Content>
</>
}
</>
React doesn’t replace any existing tags, so to avoid duplicate meta tags we need to remove our existing tags from layout.cshtml.
Now if you click your links, everything should be working as expected. You can see the page title update and you can inspect the document to see the meta description tag update.
And that’s it, you now have a fully functioning Umbraco, React, Vite, and React Router site set up and working.
Conclusion and downloadable example project
In this article we recapped everything we covered in part 1, but instead of using a starter kit we created a simple site from scratch. We set up React with Vite, Vite.AspNetCore, and set up a simple front-end.
Then we installed and set up React Router to allow for navigating around our site without the need for full page refreshes.
Finally we showed you a React 19 feature to update meta data.
In the next article we’ll build upon this site and show you how to implement the Umbraco Block Grid editor in the front-end, using layouts (with support for nested layouts) and content blocks. For now though, give it a go yourself and get in touch if you have any queries or comments.
You can find the sample project here.

Building a React frontend for an Umbraco headless CMS | Part 1
02/04/2025
Using a worked example, our Umbraco experts walk you through using Umbraco’s headless APIs to work with a React frontend.

Building a React frontend for an Umbraco headless CMS | Part 3
23/05/2025
Expanding type of content we support to use the Grid Block Editor, recreating Razor views into reusable React components.